How to Grow
AN Herbal Tea Garden
Ready to grow your own herbal tea? Here's how to give your garden a healthy start and keep it thriving through the growing season.

Note: A little pre-planning is key to success!
If you haven't thought about the best place to plant your herbs, which herbs will grow best in your area, how many plants or seeds to buy, etc. ... click on over to my Herb Garden Planning page. Then come on back here when you're ready!
What's On This Page?
(Click a link to jump straight to that section)
 My go-to gardening tools. Gloves, snippers, trowel, shovel, fork and my trusty garden tool belt with pockets to keep everything within reach.
when to start your herb garden
Who doesn't love those first warm days of spring?!
After a long, cold winter, we all have the urge to spend time outdoors in the fresh air and sunshine. It's the perfect time to start your new herb garden, right? Maybe, maybe not.
Before you go digging and planting, there are a few things to think about:
- Is your garden still soggy from the spring thaw?
- Has the soil warmed enough yet?
- How's your soil's drainage?
When your soil's moisture, temperature and drainage are just right, then it's time to start your herbal tea garden!
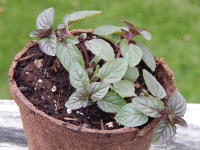
 Spring planting "Cotton Candy Mint", one my favorite easy-to-grow tea herbs.
testing soil moisture
Over-working wet soil tends to break down the soil's structure. As it dries, the soil's natural air pockets compress, leaving hard clumps of dirt that air, nutrients and beneficial insects can't penetrate.
In short: working soggy soil creates a mess!
So, no matter how ready you are to start raking and weeding and digging and planting ... make sure your soil is ready, too!
Here's how ...
Grab a handful of soil. Squeeze it. Then open your hand.
If your wad of soil is all gloppy and sticks together when you poke it with your finger, it's too wet to work with.
Give your garden some time to dry out a bit. Then test again in a few days.
When the soil forms a loose ball that crumbles apart easily, it's ready to be worked!
 Warm, Lightly Moist Soil. Ready for Planting!
Testing soil temperature
Remember, your plant's roots will live 4-6 inches (10-15 cm) below the surface. So it should be warm enough down there to keep the roots from catching a chill.
How warm is "warm enough"? At least 60° F (16° C) is good. Warmer is better.
 Still too chilly for planting!
As you can see in the photo, I use a digital thermometer to test my garden soil temperature. But there's no need to go that tech-y if you don't want to.
This simple thermometer is inexpensive, and it'll do the trick. Just stick the probe deep into the soil, and give it about 10 seconds to accurately register the temperature.
testing soil drainage
Too-fast drainage allows water and nutrients to slip right through a plant's roots. Not good.
Too-slow drainage leaves the roots sitting in slop, encouraging rot to set in. Also not good.
Here's an easy way to see how your soil drains ...
Grab a shovel, a timer, and your watering hose. Then head out to your garden.
- Dig a hole about a foot deep and a foot wide.
- Fill the hole with water.
 Completely Fill Your Test Hole
- Now, time how long it takes all the water to drain from the hole.
10 to 15 minutes? That's what we gardeners - and our herbs - hope for!
* Helpful Hint: Does your soil drain too quickly or too slowly? In most cases, the problem is fixable.
Here's a great article about improving poor soil.
Choosing Potting Mix for Container Herbs
Planning to grow your herbs in pots or planters?
Don't use garden soil. It’s too heavy and doesn't drain easily enough for container gardening. (Another lesson I learned the hard way!)
Instead, use a good-quality potting mix designed for containers. I like Black Gold because it drains well but still holds moisture. I've used it for years without any problems.
[Go Back to Page Contents List]
Planting your herbs
Now that your soil is ready to go, it's time to decide ...
seeds or starter plants
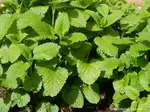
Many popular tea herbs are difficult — and some are virtually impossible — to start from seeds.
Even with herbs like chamomile and lemon balm that are easy to grow from seeds, using nursery-started plants takes the guess work out of it.
When you buy transplants from a reputable garden center or online dealer, you'll know your herbs have had the best start in life.
So go with nursery plants, especially if this will be your first season growing your own herbal teas!
Planting a Nursery grown Herb
If you’re new to working with nursery-grown herbs, here’s a simple way to get them off to a healthy start:
-
Dig a hole about as deep and wide as the pot the plant came in.
-
Slide the plant out of its pot by tipping it sideways and squeezing the sides gently. Don’t yank the stem!
-
Check the roots. If they’re packed tightly or circling the bottom, tease them apart gently with your fingers before planting.
-
Set the plant in its new home at the same level it was in the pot — not higher or lower.
- Backfill with soil and press lightly to remove air pockets.
- Water thoroughly from the base of the plant, so the soil settles around the roots. If the soil sinks, add a small handful more. Just don’t bury the stem.
*Tip: For container herbs, use a good-quality potting mix — not garden soil. Potting mix drains better and helps prevent root rot.
[Go Back to Page Contents List]
caring for your herb Garden
Congrats! You're officially a DIY Herbal Tea gardener!
Now, let's move on to the basics of maintaining your herb garden ...
fertilizing your herbs
One of the biggest mistakes many first-time herbal tea gardeners make is over-fertilizing.
When herbs are over-fed, they grow big, beautiful, bland-tasting leaves. Bland ingredients are definitely not what you want for your tea!
- For in-ground plants: Work a handful or two of good-quality organic compost into the top inch of soil around your plants.
- For container-grown herbs: If your potting mix already has fertilizer in it, hold off on feeding for the first month or so. After that, an every-now-and-then feeding of all-natural liquid plant food, mixed at half strength, will be enough to help your herbs produce lots of wonderfully flavored tea.
 I feed my container-grown herbs with Neptune’s Harvest mixed right in the watering can.
weeding your garden
Sorry, there's no way around it. Even container plants sprout a few stray weeds throughout the growing season. So weeding is a must!
Your herbs shouldn't have to compete with weeds for sunlight, water, nutrition and air circulation. Plus, a nicely tended garden space looks so pretty. So keep it tidy!
mulch or no mulch?
In the garden bed, a 2 inch (5 cm) layer of mulch goes a long way toward keeping weeds at bay. It also helps maintain an even soil temperature and moisture level. So mulch is my friend ... and likely will be yours, too!
The best mulch choices are:
- well-aged organic compost or cow manure
- natural pine bark (not the artificially colored stuff!)
- clean straw
 I use pine mulch. The all-natural kind — no dyes, no funky colors, no chemicals.
With other mulches, you have no idea what kind of yucky stuff is in them.
Recycled wood or rubber-based mulches might contain toxic chemicals from their "prior life". Plus, rubber stinks to high heaven in the hot sun. Blechh!
Landscape fabrics do a good job of reducing the need to weed. But some fabrics do contain chemicals. And if the fabric isn't permeable enough, it prevents water and nutrients from getting through to your plants.
So my mulching caution is: Be absolutely certain any mulch you use is permeable, organic and 100% chemical-free. You don't want potentially toxic stuff anywhere near your tea ingredients!
Tip: It's best to keep mulch at least 4 inches (10 cm) away from the base of your herbs. Putting it right up against the stems of your plants invites stem rot and bugs.
how often to water
As you get to know each of your herbs personally, you'll begin to recognize their "Gimme a drink!" and "Enough, already!" signals.
Until then, here's a quick guide to their moisture preferences:
Moisture-Loving Herbs
These herbs like uniformly moist soil, but not soggy:
- Mints
- Lemon Balm
- Lemongrass
- Stevia
- Lemon Verbena
Drought-Tolerant Herbs
These herbs can tolerate less-frequent watering:
- Chamomile
- Rugosa Roses/Hips
- Lavender
How can you tell when your plants need water? Poke your finger into the soil. If it feels dry 2 inches (5 cm) below the surface, it's time to give your plants a drink.
The best time to water your herbs is in the morning, before the sun starts beating down on your garden.
Think of it as "breakfast" for your plants. Get them off to a good start with enough nice, cool moisture to sustain them through the heat of the day.
How Much Water?
A plant's roots naturally grow toward their moisture supply.
Daily, shallow watering results in weak, shallow roots. So water less often, giving your herbs a slow, thorough soaking each time. That'll help them grow a strong, deep root system.
[Go Back to Page Contents List]
herbal TEa herb guides
Every herb has its own little quirks, so it’s worth getting to know them one by one.
Want to learn how to grow, harvest, and brew the most popular tea herbs? Start with these guides:


Recent Articles
-
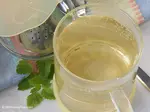
DIY Lemon Balm Tea: Easy Brewing Instructions for Hot and Iced Teas
 Here's the easy way to make hot and iced lemon balm teas. Step-by-step brewing guide, and the secret to chilling hot tea (almost) instantly for super-cold ...
 -
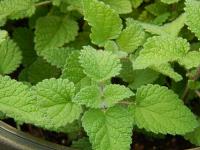
Ditch That Store-Bought Lemon Balm Tea ... Start Growing Your Own!!
 Why grow your own lemon balm? Simply put: fresh-from-the-garden lemon balm tea puts the commercially grown stuff to shame! See the easiest way to grow and ...
 -
Make Your Favorite Herbal Tea from Scratch (Hint: It's Easy to Do!)
 Use these simple how-to's, tips and tricks to make your favorite herbal tea at home. See the best ways to brew hot and iced teas from scratch using fresh ...