How to Grow Chamomile
for herbal tea
Discover how easy it is to grow chamomile. Before you know it, you'll be harvesting and brewing your own homegrown chamomile tea.

which chamomile to grow: Roman or german?
Roman (a/k/a "English") Chamomile is a great option for areas of your yard where you'd like lush, fragrant ground cover. And yes, it'll produce a smattering of flowers throughout the summer months.
But for your herbal tea garden, German Chamomile is a much better choice because it produces waaaaay more flowers (i.e., more tea) than the Roman variety. It's also super-simple to grow from seed.
So let's focus on the how-to's of growing German Chamomile.
where to grow Your Chamomile
sun/shade requirements
Choose a sunny location. At least 6 hours a day of direct - but not scorching - sunlight is good.
If you live in a region where your summer sun is like a blast-furnace, your chamomile will appreciate plenty of morning sunlight, then dappled shade in the afternoon.
soil requirements
Chamomile grows best in average garden soil that drains well.
Too much clay in the soil smothers fine roots, making it difficult for the herb to thrive. And overly sandy soil lacks important nutrients, resulting in a scrawny plant with few blossoms.
For container planting, go with a good-quality potting mix. I love Black Gold. It's a bit more expensive than some other brands. But I'm willing to pay a few dollars more for a product that's: (a) organic; (b) made in the USA; and (c) works like a charm for all my potted plants!
 Chamomile in a Planter on My Deck
when to plant chamomile
The best time to sow chamomile seeds is:
- early spring, after the normal last frost date in your area; or
- late fall, when the days have turned cold but before the soil freezes.
TIP: Chamomile loves warm days and mild nights. Intense heat seems to stress it out. If you live in a tropical locale, sow your seeds in winter for an early spring harvest.
how to plant chamomile
Whether you're planting in the ground or in a container, the steps are essentially the same ...
Prepare Your Soil. Make sure your soil is loose, weed-free, and reasonably level.
Handle your seeds with care. Chamomile seeds are tiny. A gust of wind can blow them right out of your hand. (Yep, I learned that the hard way!)
 Super-Closeup of Chamomile Seeds in Garden Soil
(See the 2 Seeds in the Green Box? Tiny!)
Slowly sprinkle a light dusting of seeds over the surface of your soil. Aim for about 3 or 4 seeds per square inch of soil area.
If too many seeds land in one spot, gently move them around until they're as evenly distributed as you can get them.
It's not a big deal if some seedlings germinate too closely together. You'll be "thinning the herd" soon, anyway. (More about that in a minute.)
Firm Your Seeds Onto the Soil. Chamomile seeds need direct exposure to sunlight to germinate and grow. So don't bury them! Just lightly pat the soil with your fingers to assure good seed/soil contact.
Mist Your Seeds. Now, water your seedbed. I recommend setting your garden hose nozzle to "Mist". A stronger water flow can dislodge your seeds, allowing them to float together into one clumpy mass. Until your seeds have germinated - don't soak, just mist!
Mark Your Location. Place a garden marker in the soil to remind yourself what's planted there. (This step is optional, but highly recommended.)
Water and Wait. For the next week or so, keep the seedbed evenly moist. And be patient! If Mother Nature cooperates with nice warm weather, in about 10 days you'll begin to see little seedlings popping up.
 Tiny Chamomile Seedling
A Few Days After Sprouting
Thinning Your Seedlings
As much as it might break your heart to remove precious little sprouts from their bed, it must be done. For the best flowering (i.e., lots of tea), these babies need plenty of air circulation and room to grow.
So suck it up. Be strong. Do what you have to do!
 I Should Have Thinned These Over-Crowded Seedlings Weeks Ago!
Carefully remove the smaller, weaker-looking seedlings, leaving each remaining seedling with at least 1 square inch (6.5 sq. cm) of space all to itself.
As you're thinning, it's important not to disturb the delicate roots of the nearby "keeper" seedlings. So I use cosmetic scissors to snip the "go-ers" at dirt level, rather than pull them out of the soil. Scissors are a less traumatic removal method - for all involved ;-)
 Cosmetic Scissors Are The Perfect Size For Thinning Tiny Seedlings!
how to Transplant Chamomile
Some herb gardeners will tell you that chamomile doesn't like to be transplanted. Nonsense! I've never had a problem doing it.
The best time to transplant chamomile is when the plant is only 2 - 3 inches (5 - 8 cm) tall. Once it's grown taller and started to form buds, it's totally focused on flowering. At that point, leave it alone to do its thing!!!
 Buds Forming On Young Chamomile Plant
Here's my [nearly] foolproof method for transplanting chamomile:
- First, ready the plant's new home. If you're transplanting to a container, fill the container with potting mix, and moisten the mix. For transplanting into the garden, work the soil lightly through your fingers to be sure it's free of weeds, rocks and clumps.
- Then, very carefully remove the plant from its current home. To avoid damage to the delicate roots, try to keep as much soil as possible with the plant during the moving process.
Helpful Hint: When I'm transplanting small seedlings, I use an old tablespoon as a makeshift trowel.

- Now, settle your little plant into its new home, and gently tuck new soil around the "root ball".
Be sure to set your transplant at the same depth in its new location as it was in its prior home. - Finally, lightly water your chamomile in ... and give it a kiss for luck!
(Okay, the kiss is optional. But it can't hurt ;-)
how to Care for Your Chamomile Plants
When I say these plants pretty much take care of themselves, I'm not kidding. In all my years of growing this herb, I've found only one thing that'll do it in: Over-watering.
how often to water
Chamomile plants only need a moderate amount of moisture to keep them growing strong.
After your seedlings are established in your garden or container, give them a nice, deep drink of water once a week - less often during rainy spells.
how to fertilize
A half-inch of organic compost scratched into the top inch of your garden soil in the spring will keep your chamomile fed all summer long. Add the compost about 2 weeks before you plant.
For container-grown chamomile, add a liquid organic fertilizer to your watering can each time you water. My go-to fertilizer is Neptune's Harvest Fish Fertilizer mixed at 1/2 ounce per gallon of water.
does chamomile need pruning?
No pruning is necessary. Just harvest fresh blossoms every few days. That'll encourage repeat flowering ... and give you even more tea!
more about chamomile ...


DIY HERBAL TEA BASICS
Ready to learn more about growing your own herbal teas? These pages cover the broader how-to’s:
- Planning Your Herbal Tea Garden
- How to Grow Herbs for Tea
- How to Harvest Your Herbs
- How to Preserve & Store Your Herbs
- How to Make Herbal Teas

Recent Articles
-
DIY Lemon Balm Tea: Easy Brewing Instructions for Hot and Iced Teas
 Here's the easy way to make hot and iced lemon balm teas. Step-by-step brewing guide, and the secret to chilling hot tea (almost) instantly for super-cold ...
 -
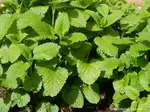
Ditch That Store-Bought Lemon Balm Tea ... Start Growing Your Own!!
 Why grow your own lemon balm? Simply put: fresh-from-the-garden lemon balm tea puts the commercially grown stuff to shame! See the easiest way to grow and ...
 -
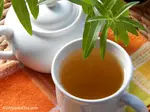
Make Your Favorite Herbal Tea from Scratch (Hint: It's Easy to Do!)
 Use these simple how-to's, tips and tricks to make your favorite herbal tea at home. See the best ways to brew hot and iced teas from scratch using fresh ...